This tutorial was prepared long ago for Gertrudis Pro, but it is still useful to demonstrate concepts and techniques.
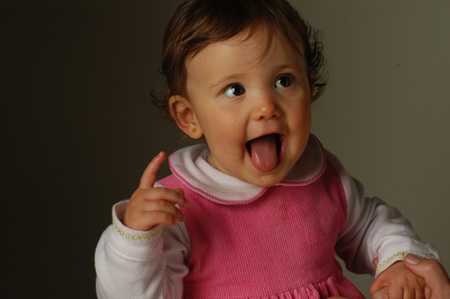
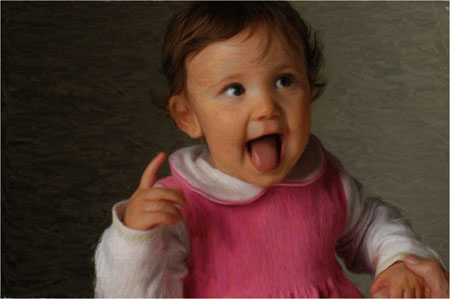
1. The Photograph: In order to achieve a nice picture is better to start from a great photography, this photo was taken by a professional Photographer: Emilio Guerrero
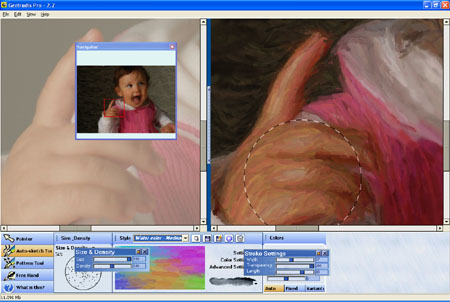
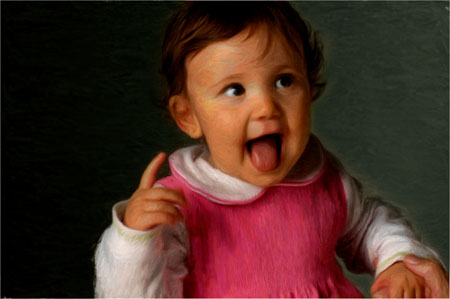
2. Open your Image with Gertrudis Pro:

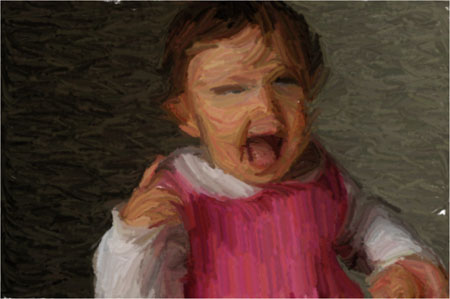
3. Apply coarse strokes along the image: In this case I selected the style named «Watercolor-Large Size», and applied it along the whole image using the Autosketch Tool. Don’t Panic!, this is not the final result.
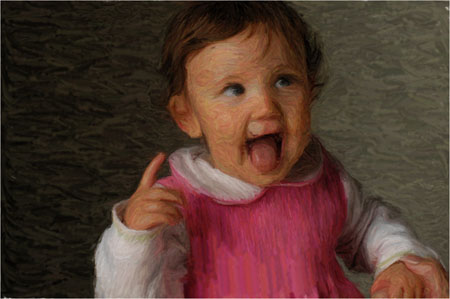
4. Refine the size of the strokes: and apply the Autosketch Tool only in the areas where more details is needed.
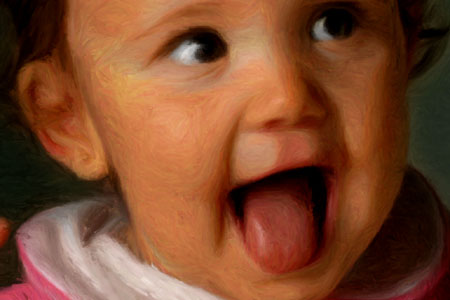
5. Refine even more the size of the strokes: and apply the Autosketch Tool in the eyes, mouth and fingers.
6. Copy the result to the Clipboard: Now we are going to switch to Photoshop, but before doing this, copy the resultant image to the clipboard. (Ctrl-C)
7. Now Switch to Photoshop: Create a new RGB image: File | New. You should notice that Photoshop suggest in the image size the same size of the contents of the clipboard. Once created the image, press Ctrl-V in order to paste the contents of the clipboard.
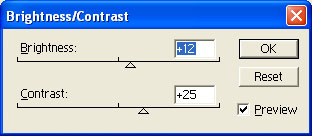
8. Create a Brightness and Contrast adjustment layer:

Use the following settings:
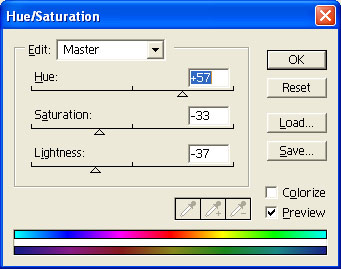
9. Create a Hue and Saturation adjustment layer: Before doing this, select the background. There is no need to make a very accurate selection, you can use for example the lasso tool, then enter in the quick mask mode (just press “Q”), and make a gaussian blur to the selection mask. Exit from the quick mask mode “Q”. Now you are ready to create the adjustment layer.
The Layers Window should be seen like that:

Final image:
Final image details: